

TheSky Professional can overlay photos from the Digitized Sky Survey (DSS) on the Sky Chart (see Figure 145) and produce a FITS image for any position on the celestial sphere and for any field of view up to 2° x 2° maximum. This historic all-sky photographic reference can be extremely useful when searching for new objects such as supernovas or asteroids or simulating an observing sesson.
To get started, you must first configure TheSky to find the Digitized Sky Survey data.
1. Click Tools > Digitized Sky Survey.
2. On the Setup tab, select the Web option (an internet connection is required). Or, if you own the Databases module (page 789), select the Disc Drive, Folder or Volume option, click the Choose button to specify the location of the Digitized Sky Survey data on the Databases module SSD, then select the Palomar Sky Survey (10x) option.
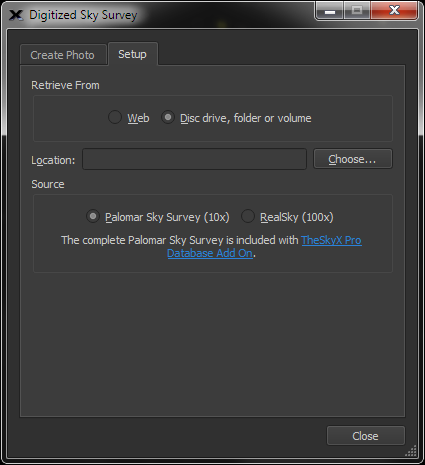
Figure 46: Setup tab of the Digitized Sky Survey window.
TheSky is now configured to find the source of the Digitized Sky Survey photos and display them based on the coordinates of the Sky Chart as described below.
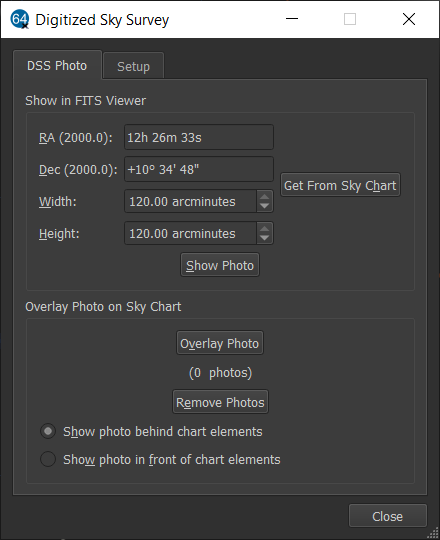
Figure 47: Use the DSS Photo tab to show Digitized Sky Survey photos.
To overlay a DSS photo on the Sky Chart:
1. Adjust the Sky Chart to the desired position and field of view. For example, frame the spiral galaxy M81 by clicking Edit > Find, enter M81 in the Search For text input, and then click the Frame button. M81 is now centered on the Sky Chart.
2. Click the DSS Photo tab. So that the orientation of the Sky Chart matches the position angle of the DSS photo, the Sky Chart is automatically switched to the Orientation > Celestial Sphere option so that celestial north is toward the top of the computer screen.
3. Click the Overlay Photo button. The photo is retrieved from the DSS data and placed on the Sky Chart.
Click the Show Photo in Front of Chart Elements option to show the photo on top of everything else on the Sky Chart or Show Photo Behing Chart Elements to show the simulated Sky Chart elements on top of the photo.
To show a FITS photo in for the current Sky Chart:
1. Adjust the Sky Chart to the desired position and field of view.
2. Click the Show Photo button. A FITS file is retrieved and displayed in a separate FITS Viewer window.
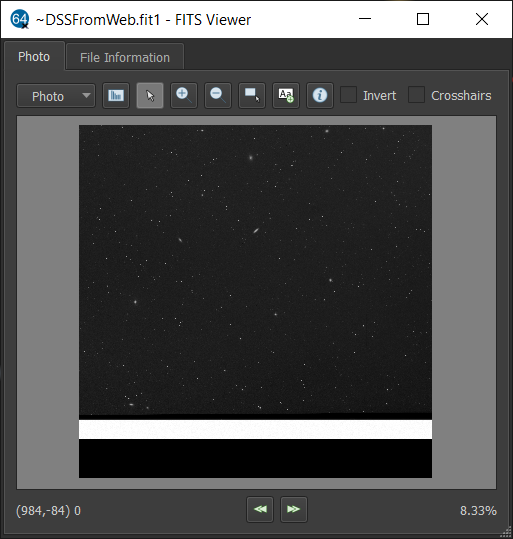
Figure 48: The white bands on DSS photos are the edges of the photographic plates.
When creating or overlaying DSS photos, you may notice a white band along the edges of the photos. These bands are the edges of the photographic plates that were scanned when the DSS was digitized. The wider the DSS photo, the greater the chance of encountering one of these plate edges.

Figure 49: M52 in the FITS Viewer window.